Photosynthesis… there was something about it that stumped me as a teacher. It was important to me that my kids understood the big picture and that they were able to answer their questions, but teaching it didn’t come naturally, because, well… photosynthesis. For you life science and bio teachers out there my BIGGEST piece of advice would be to focus on the “big picture”. Do not teach light reactions, followed by dark reactions. Teach them together, and then go back and fill in the details where you can.
I’ve compiled 5 helpful tips for teaching photosynthesis:
1. Photosynthesis can be a complex subject for students to learn. Scaffolding will provide optimal success: start off with the big picture and then work your way into the nooks and crannies.
2. Students should be able to comprehend energy flow in photosynthesis, from sunlight to sugar, and everything in between. Use my Mouse Trap game analogy to help!
3. Dark reactions and light reactions are dependent on each other through the ATP –> ADP and NADPH –> NADP pathway.
4. Teach the basic steps of the electron transport chain. There are two separate ones, each associated with a photosystem: one for ATP (indirectly through hydrogen ions) and one for NADPH.
5. Visuals. Visuals. Visuals. Keep the diagrams simple at first! Labs will help all learner types, too!
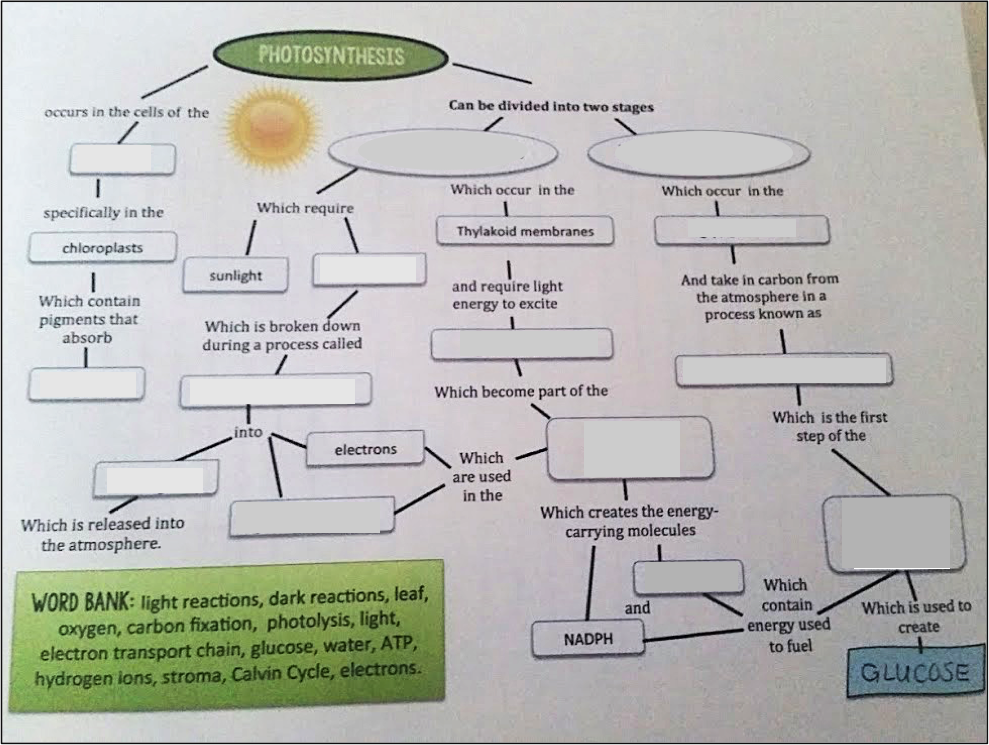
To help with this, I’m offering a free Photosynthesis Graphic Organizer!
What is the mouse trap analogy referenced in #2? Just like in the game “Mouse Trap”, each step depends directly on the previous step. If one of the processes stopped, the next step would not be able to go on (energy flow). Ask your students what they think the marble and the foot that kicks the marble out of the bucket represent!
See the video:
For more photosynthesis resources that I offer, check out my photosynthesis interactive notebook, or other types of materials you’ll find in my store (scroll down to see all the resources I have to offer in the photosynthesis category).