So you want to start incorporating digital products into your classroom, cutting back on paper, and giving your students some contemporary and new assignments…but you don’t have Google Classroom?
No problem!
You can see my initial post on digital resources and creating a shared Google account for you and your students. This is probably the easiest method, and I would recommend giving it a try. But- if you don’t want to create a shared account, and you strongly prefer that every student has their own account, then you’re in the right place!
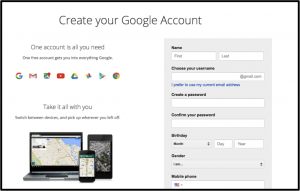
First start off by creating a new Google account. This account will be for your classroom use only, so consider that when creating your user name.
Your students will also need their Google accounts. Before they make theirs, I have two suggestions:
- Ask your students if they already have one that they are using in another class that they can also use for your class.
- Give students the option to create an account that is for school use only instead of using their personal one so they can stay more focused (imagine logging in to your personal email in the middle of a lesson- easy distractions!)
If your students need to make an account, remind them to keep it simple and school related. For example: JaneDoeWHS (name and school). Their passwords should also be simple and you can opt to have them write it down in a safe place where you can keep track in case they forget.
Once they create their account, they will need to search for you under your school Google account and follow you. This done using Google+. Creating Circles (groups) on Google+ is a good way to organize your students. You can also use Google+ to communicate to specific circles/classes using Google+, like reminding them when an assignment is due or sharing an article.

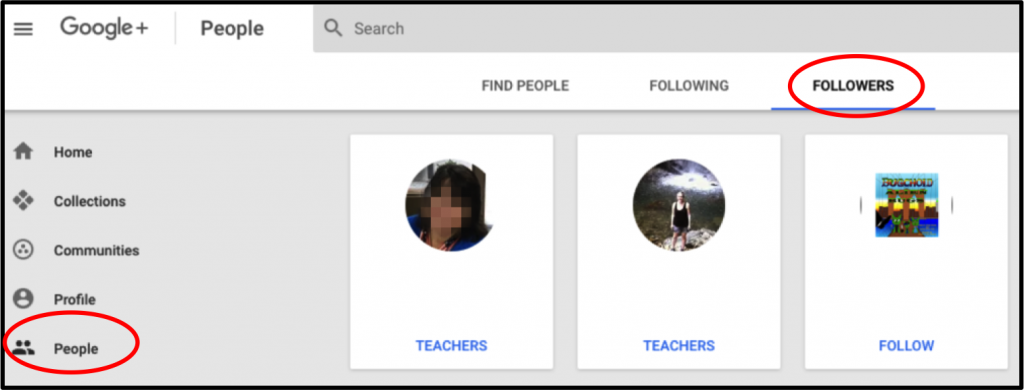
Once the students are in Google+, they just need to search for your Google account name and follow you. You will also need to follow them back. Be sure they follow you first, because it will be much easier to find all your students!
Go to Google+, select People from the left hand menu, then FOLLOWERS. When you see your students’ names under followers, be sure to follow them back!
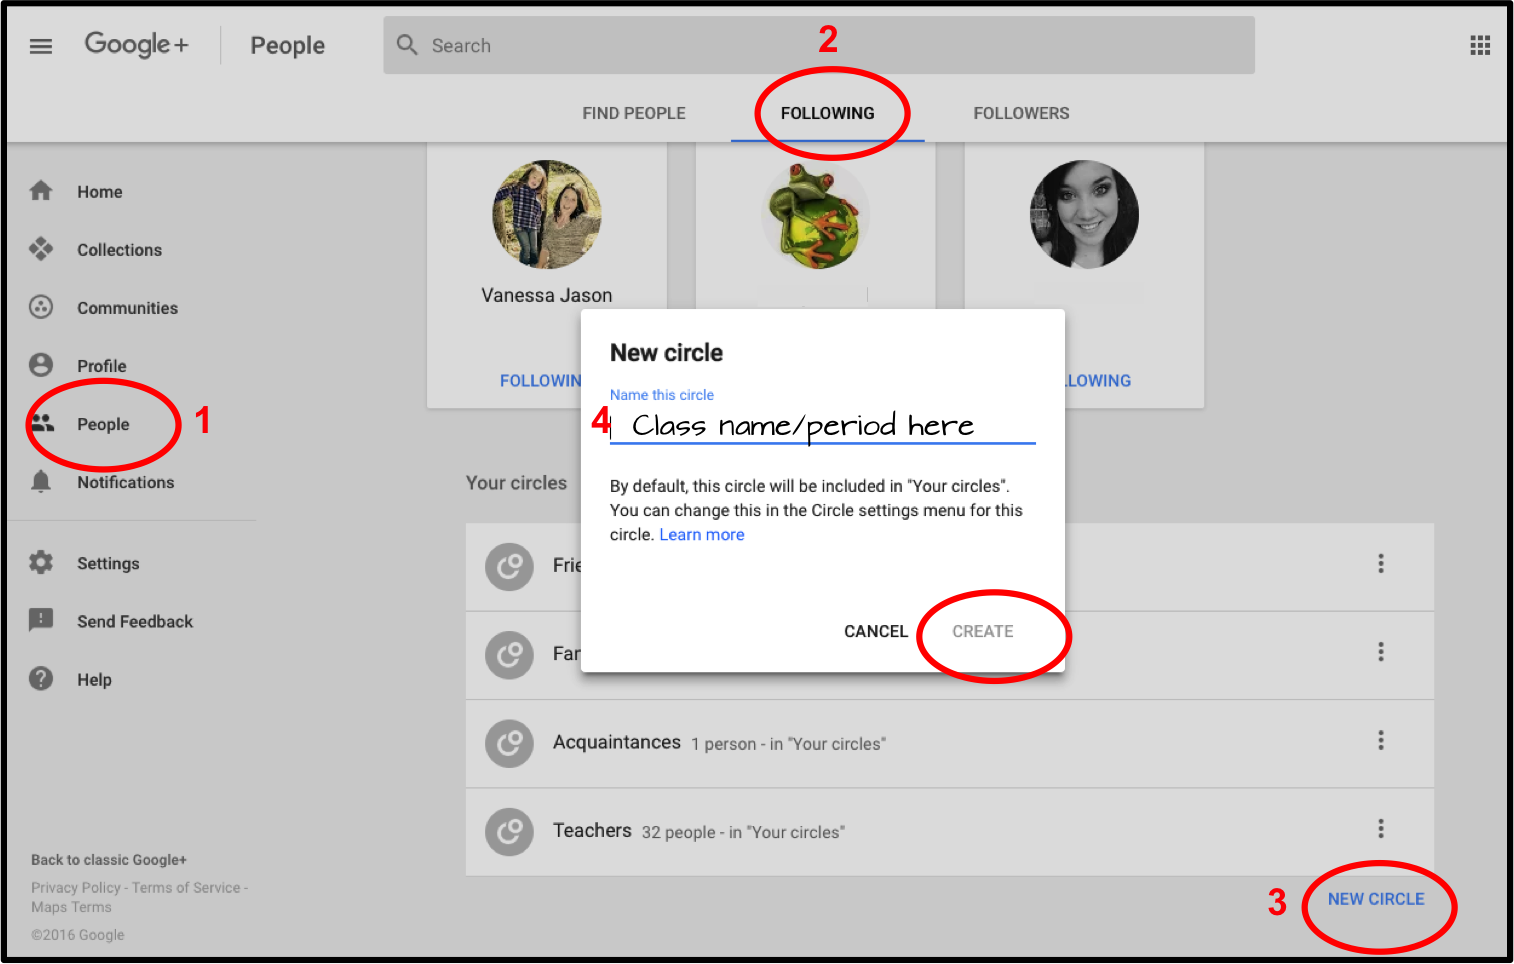
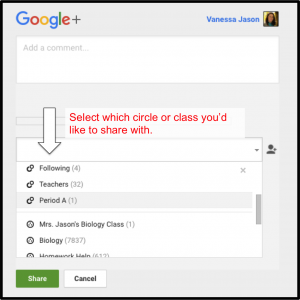
Now that everyone is following each other, you’ll need to create groups to organize them. On Google these are called circles.
In the People menu, click on FOLLOWING. Scroll to the bottom and create a new circle for each class that you are using Google Drive with. Once these circles are made, you’ll be able to add each student to the circle accordingly.
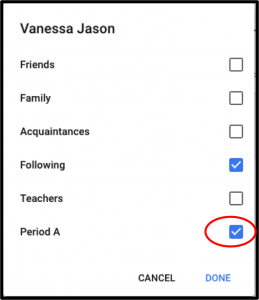
Click on each student’s name and add them to the circle.
The last step before sharing is to create a shared folder for each class. This is done using Google Drive. (Be sure to use your Google account that you’ve created for school use).
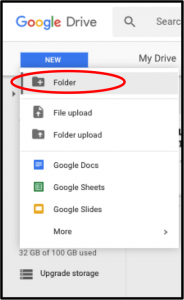
In Google Drive, create a new folder using the blue NEW button. It will prompt you for a name. You could name it by class to start and add more folders to it later if you wanted to get more specific.
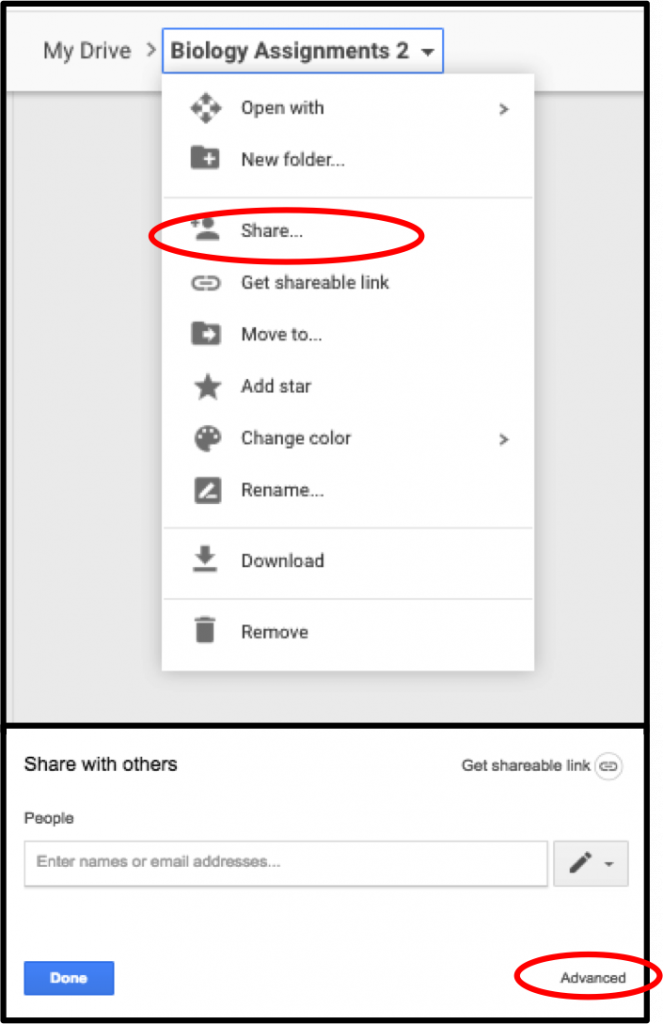
Then, share the folder by going to share and selecting “Advanced”.
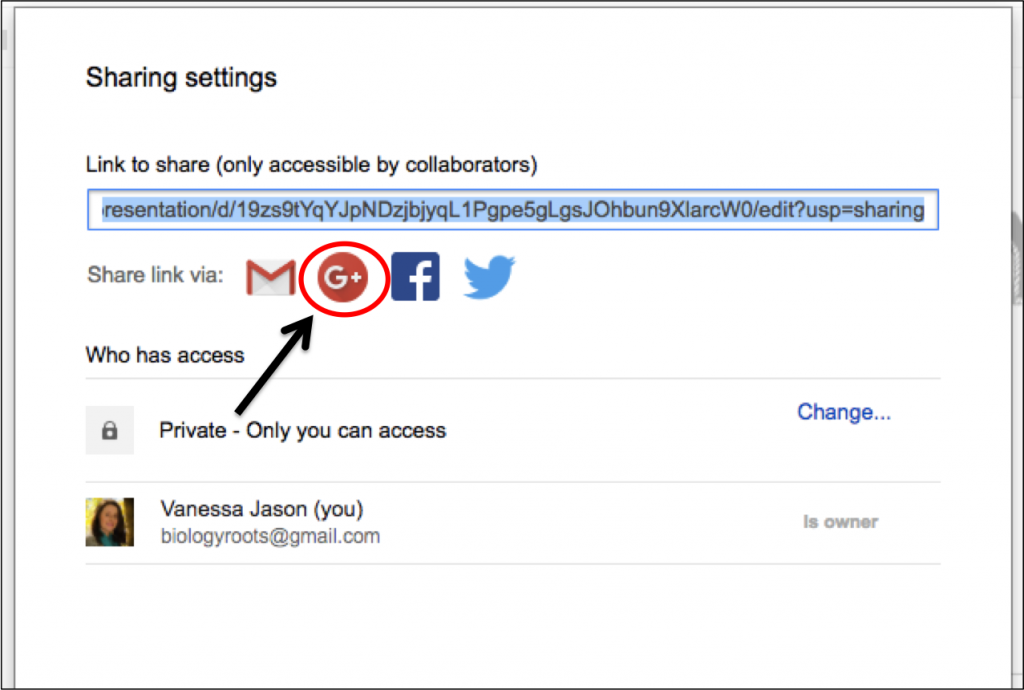
Then, select the Google+ icon.
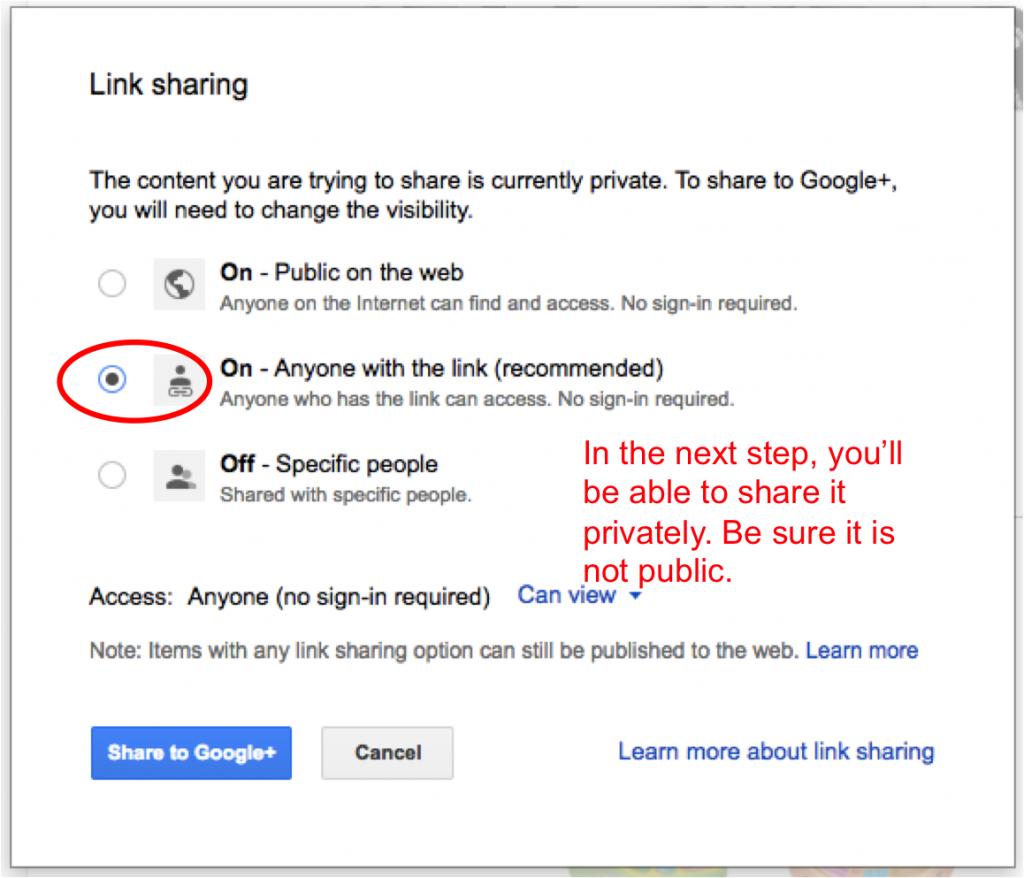
Click on “Share to Google+”.
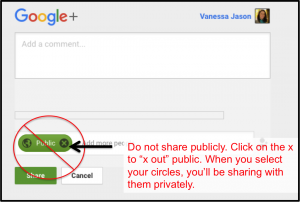
You will first be prompted to share publicly. Do not share publicly.
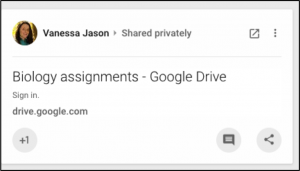
When your student logs in to his or her school Google account, they should go to Google+ to see the shared folder. This is what they will see on their Google+ page:
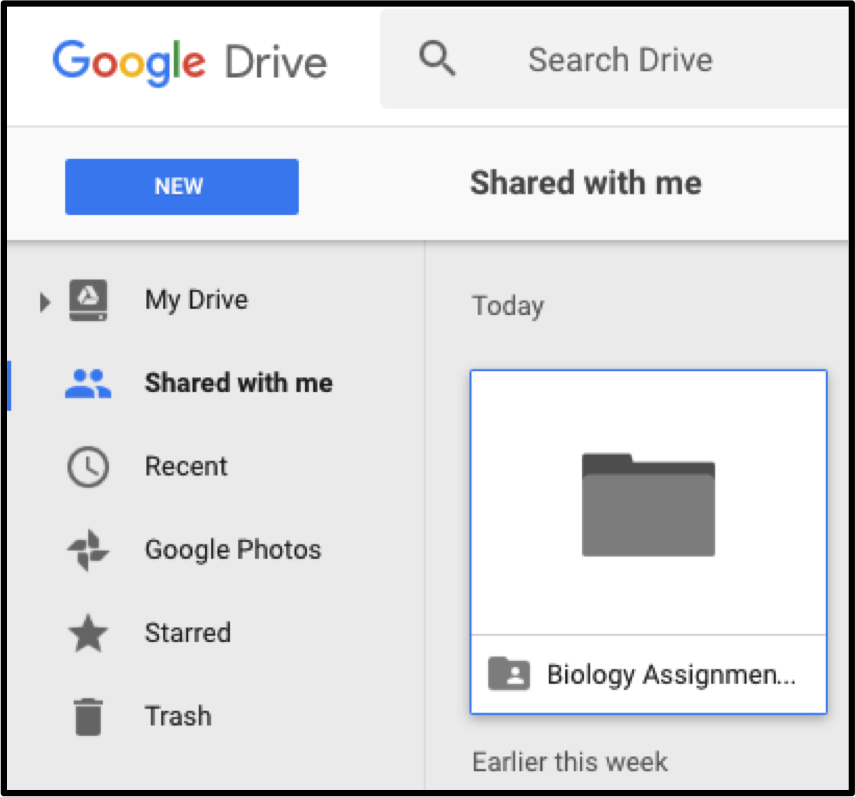
This folder is key, because from now on you can add any assignments to the folder and they will have access. *Note: You could skip this step and share it with them by typing in their email addresses instead, but I find this to be much less time consuming and like I said, it’s nice to have the Google+ option as a way to communicate with the students, too! This link takes them straight to their Google Drive, where they can see it under “Shared with me.”
That shared folder will remain in their Drive- now all you need to do is add assignments to it and have students get to work! You can also add subfolders to it to stay organized. Any documents you add to the folder will automatically show up on their end since this is a shared folder. But remember- the assignment you add must be VIEW ONLY – have students make a copy of it in their drive. If you’d like to read more on this next step, you can read about in my blog post titled “How to Assign Digital Activities using Google Drive” (coming soon!)