So, you use notebooks in your classroom but you aren’t sure how to grade them. Are you overwhelmed grading notebooks? Or just unclear how to assess? Reading how others grade notebooks can be helpful, so I’m here to reveal my secrets for grading notebooks (interactive notebooks BUT, the same principles can apply to any notebook, or even binders!) I hope this will help you save time, and I’m also here to tell you: you do not need to grade every. single. thing. in your students’ notebooks Really!

My tips for grading interactive notebooks are also applicable across disciplines (not just science!)
Before I give you the low down, it’s important to note that there are some things you can do to help set your kids up for success. In my classroom, it was as simple as using the first 5-8 minutes of class to update the table of contents while I took attendance and passed back papers. Doing so gives the students time to complete their table of contents and to organize their notebooks.
The table of contents is up on the board every day (via projector), even if nothing had changed the day before (as some students may have been absent or had not finished). You can also use this time to incorporate bellringers, but no matter what, have an updated table of contents up there at the beginning of every class.
Two Key Ideas in Grading Notebooks:
When: on test days, before the test.
How: I would check 10 assignments. Yup. That’s it. Because time is important.
You may be asking, that easy? How? Let’s back up…
Student self-evals at the beginning of the year can do wonders
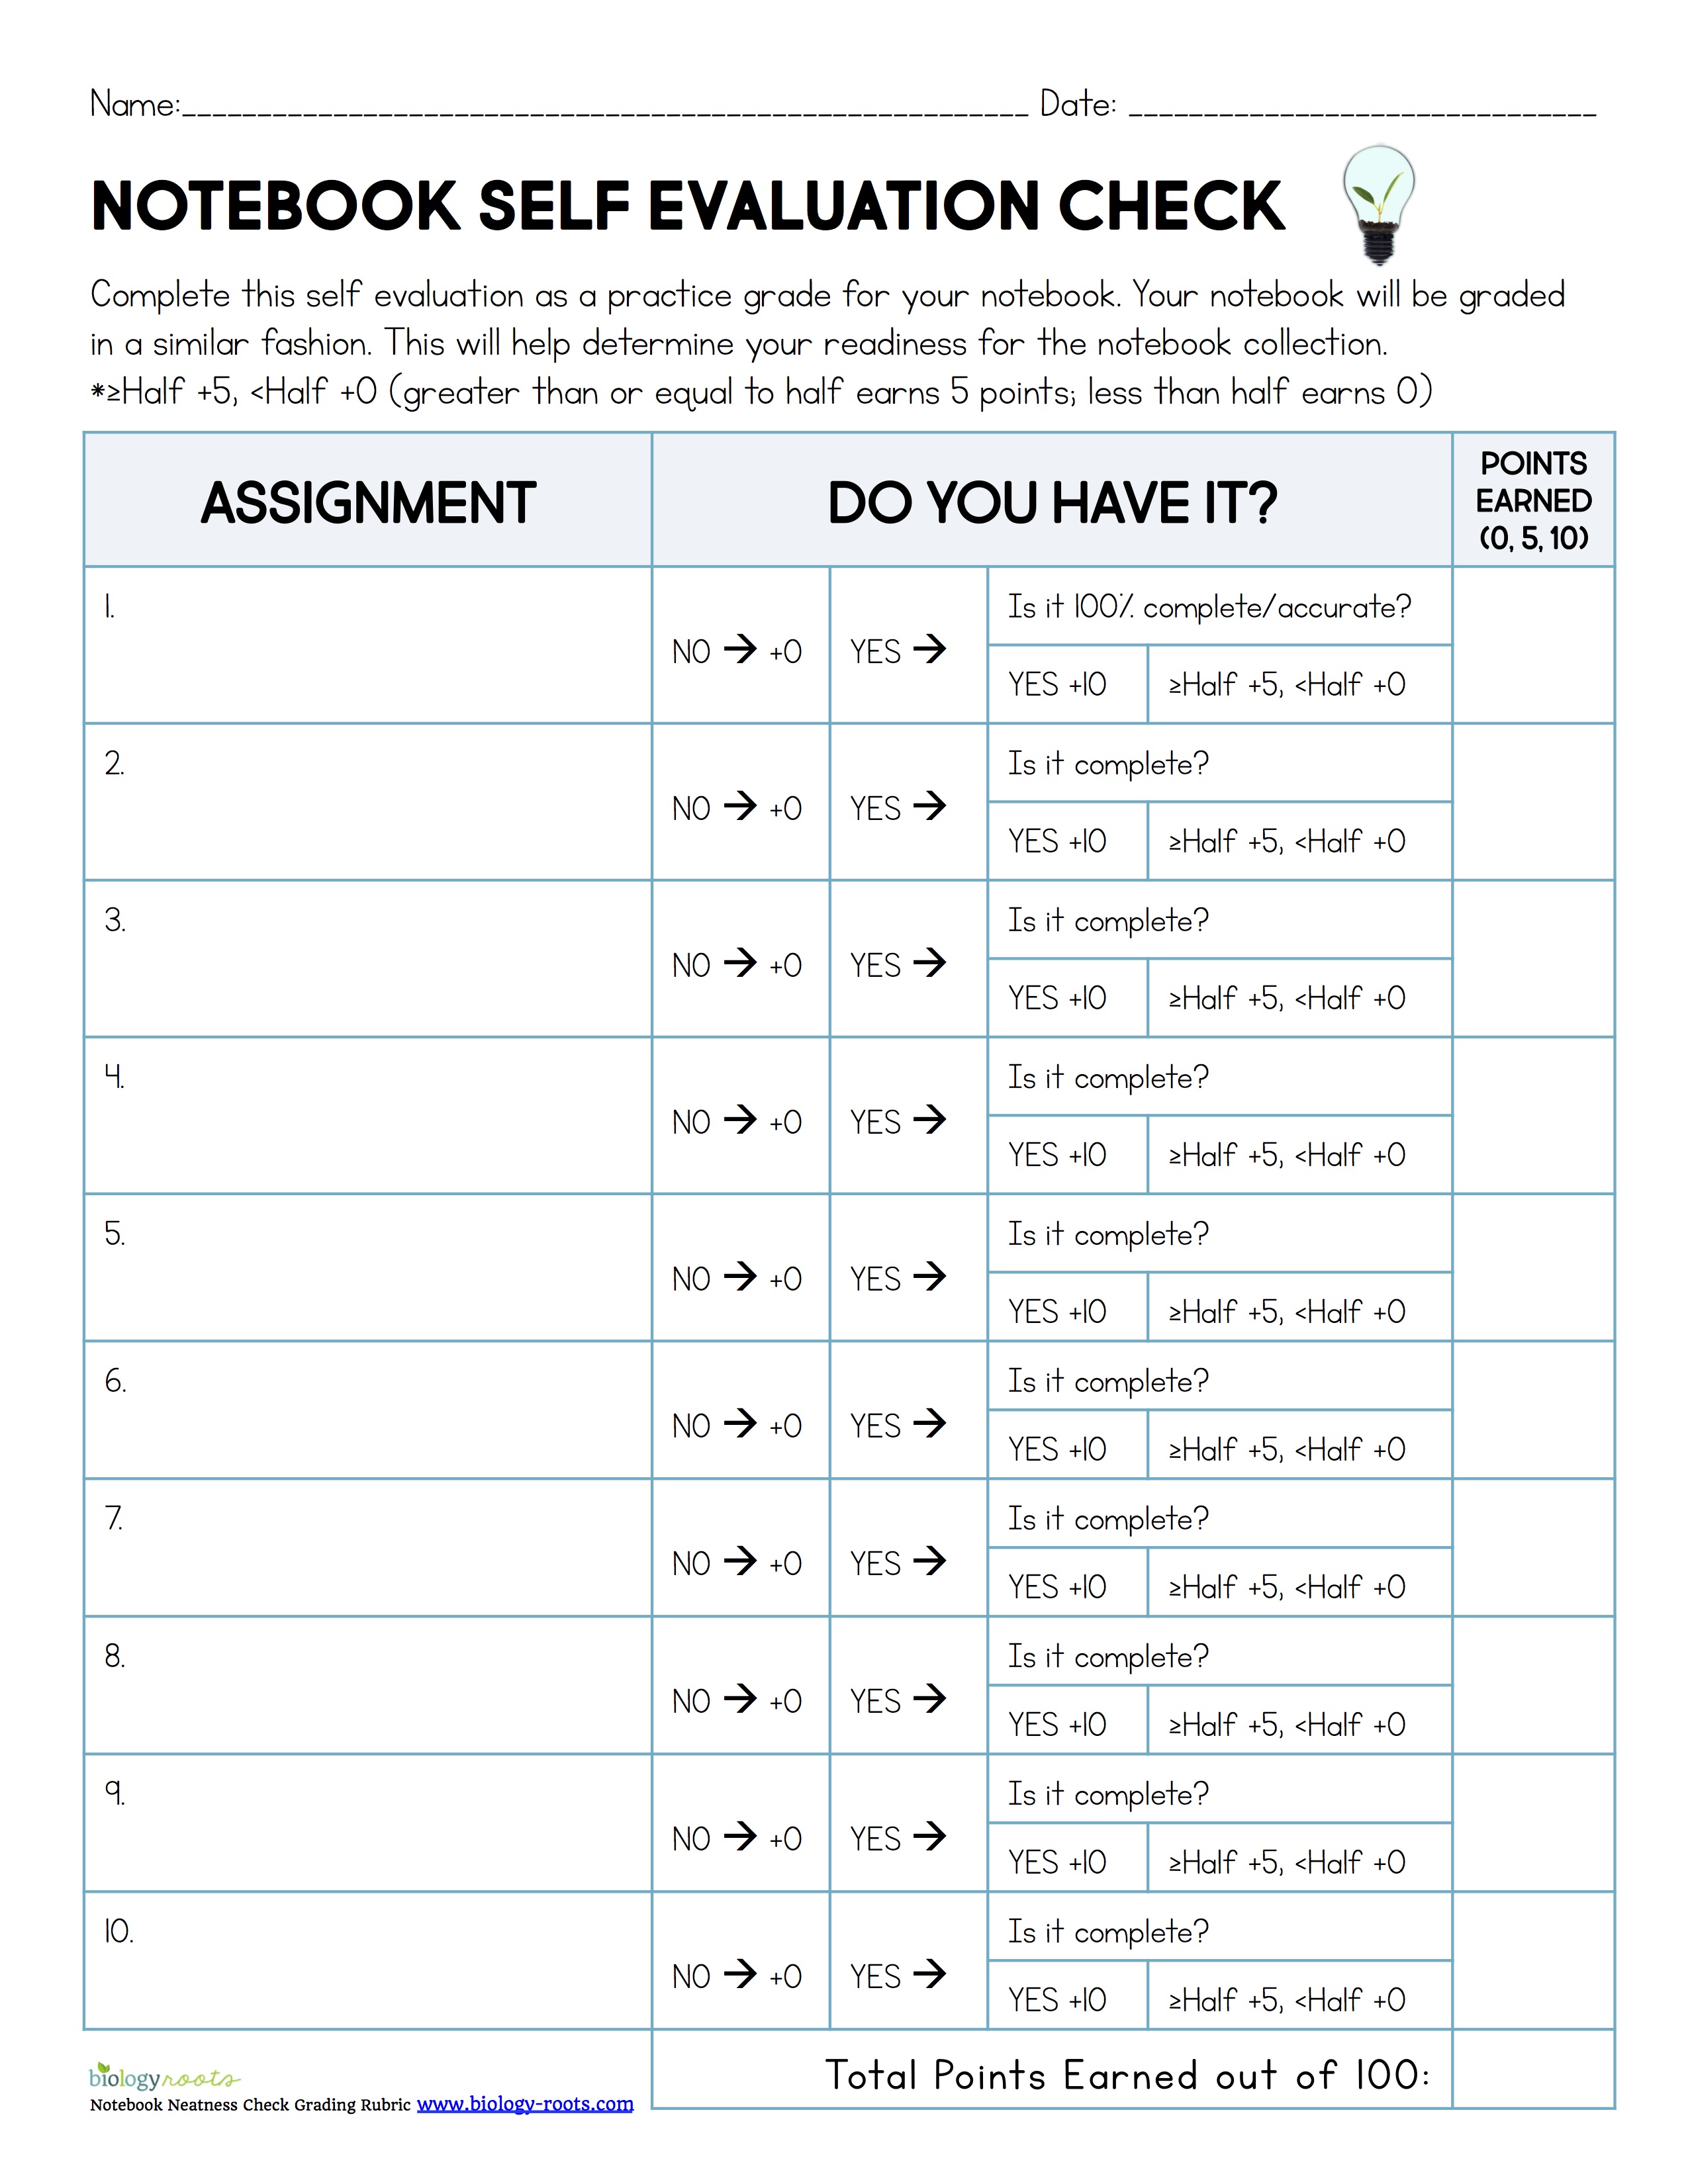
About a week before the test, we’d do a self-eval. I’d remind the kids when I check the notebook, and that it would be 10 random assignments worth 10 points each. So, as a “practice run”, I would write 10 random page/assignment numbers on the board and they would do a self evaluation to come up with their own grade. If needed, I’d provide this rubric to guide them:
A self-eval get students thinking about the shape of their notebook; and here’s a pro-tip: it’s really helpful to do this on a day you can stay after school if you can’t devote the time in class to do so. Kids get energized and motivated with these self-evals, and it makes you feel better about grading their interactive notebooks, too!
Is this the same as the teacher rubric? Yes and no….
For example, the self eval is actually a bit stricter than my own methods, which isn’t a bad thing. When I grade, I use a looser evaluation. For example, I might only take 2 points off for incompletion out of 10, instead of sticking to a strict 5 points like the student self-eval suggests.
Easy Optional Rubric for Teacher Grading:
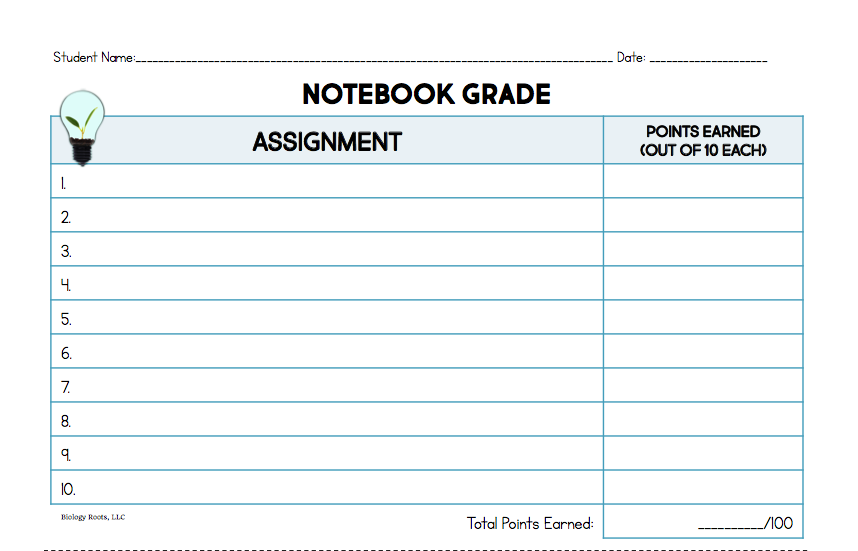
If you’d like a copy, you can download one here. Note about download: Text boxes are provided for your convenience: you can modify them with specific assignments, or if you prefer, delete them and hand write assignments after printing.
Important to note: the assignments were random, and I would not tell my students what the assignments are ahead of time. The students were expected to have all assignments completed. As far as choosing assignments, there were some assignments that were more significant to me than others so I’d choose 10 assignments that were valuable.
That’s it.
Done.
But wait! If you’re thinking, what about neatness!? What about the table of contents!?
Let me quickly say, I taught high school. I gave students time in the beginning of class that I had mentioned? The table of contents? All that stuff was simply to help get them organized to set them up for success. One big rule I had was if I could not find their assignment, I could not give them credit for it. Not where it’s supposed to be? Zero credit. Don’t come to me the next day saying it was there. I’d write notes where it was supposed to be saying it’s missing or out of order to prevent that.
But if that’s not your style, I’ve got you covered.
For instance, in the beginning of the year, I’d do random neatness checks as quiz grades with some of my classes. This was to help train their executive functioning to be on top of their organization.
Optional Notebook Neatness Check if that’s Your Jam:

You can download the neatness check rubric here.
Tips on Grading Digital Interactive Notebooks
If you use digital interactive notebooks in your classroom, you’re probably wondering how to grade them. The theme here is preventing teacher burnout. So how do you grade without wasting 56 hours each day? 😉 Simple: create a self-grading Google Form with 10-20 questions for each digital ISN. There are different ways to do this.
One way: make it an open notebook quiz that has everything to do with how the students were expected to interpret the information and not necessarily the text. For example, one question might be “on page/slide 14 of your notebook, you were asked to build a diagram. Which order were the objects in?” Or, “On the energy pyramid you built on slide 11, which organism was found at the third trophic level?”
Another way is to simply have general questions as you would any other quiz to make sure the students are grasping the information that allows them to grow and learn as students.
I hope this helps and gives you some ideas as to how you can grade notebooks in your classroom!
TL;DR
- Give students time at the beginning of the class to organize their notebooks and table of contents.
- Grade on test days (students hand in notebooks before the test at the beginning of class).
- Choose 10 assignments to grade worth 10 points each
- Self evaluations before test were helpful (see rubric)
- Neatness checks optional (see rubric)
- For digital interactive notebooks, use Google Forms as a quiz.
Take care,